
What Does JK Mean for a Go Rhino Jeep in USA 2026?
January 18, 2026
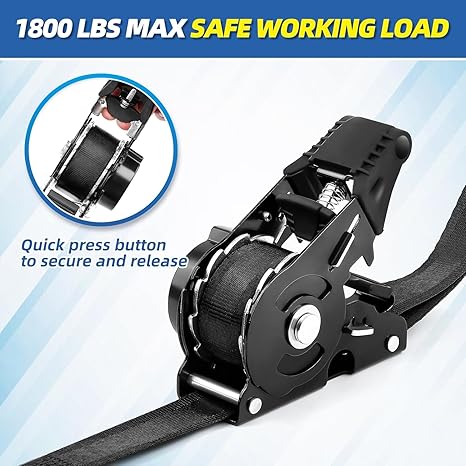
Use Go Rhino Ratchet Straps in the USA 2026
January 20, 2026
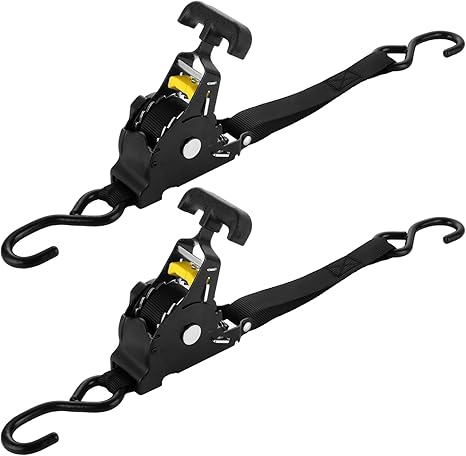
What Is the Correct Way to Release a Ratchet Strap?

Releasing a ratchet strap the right way is important for safety and to avoid damage.
What should you know before releasing?
- Always support your load before releasing tension
- Use the release lever instead of forcing the handle
- Open the ratchet fully to disengage the mechanism
How does the release process work?
- Locate the release lever on the ratchet
- Pull the lever up and open the handle completely
- Wait for the click sound (this unlocks tension)
- Slowly pull the strap out
- Remove hooks carefully after slack
Why is proper release important?
- Prevents sudden snap-back injuries
- Protects strap mechanism from damage
- Keeps your cargo stable during unloading
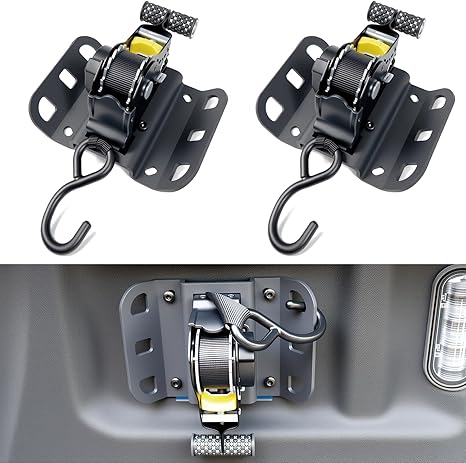
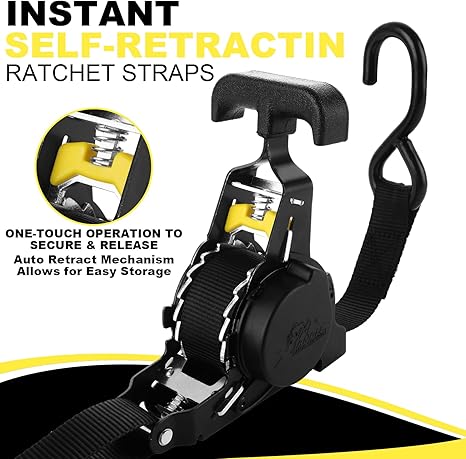
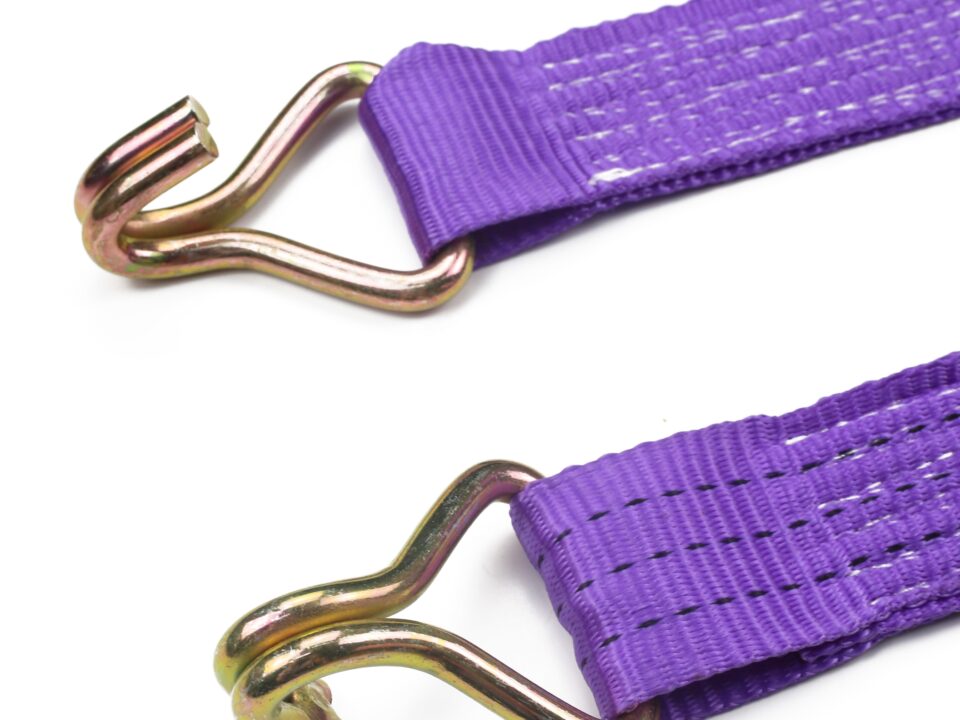
Standard vs Retractable ratchet straps
Releasing different types of ratchet straps can feel confusing.

What is the difference between both types?
Feature | Standard Strap | Retractable Strap |
Release Method | Manual lever | Button + auto release |
Speed | Slower | Faster |
Ease of Use | Needs practice | Beginner-friendly |
Which one is easier to release?
- Retractable straps are quicker and simpler
- Standard straps need manual control
- Both are safe if used correctly
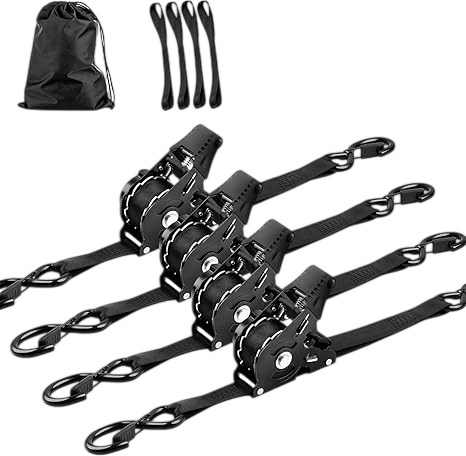
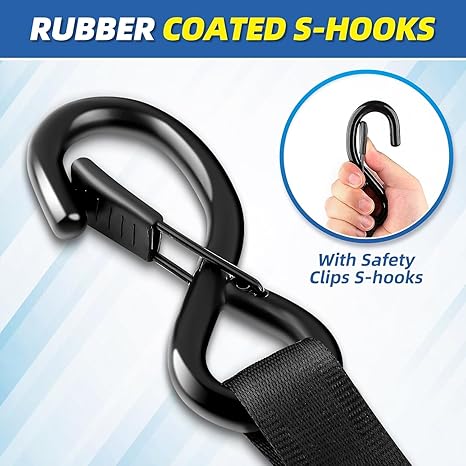
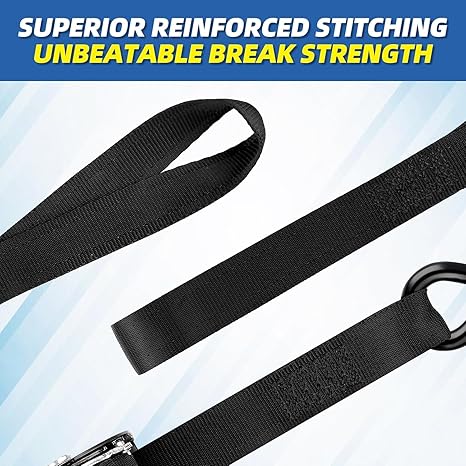
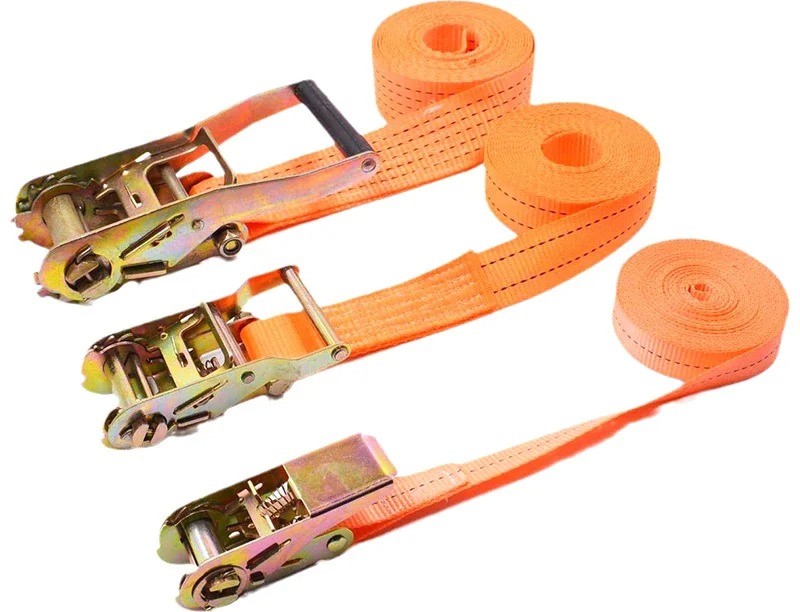
Best types of ratchet straps for easy release

Choosing the right strap makes releasing easier.
Which straps are best for smooth release?
Type | Best For | Strength Level |
Heavy-duty 2-inch | Large loads | Very high |
Medium-duty 1-inch | Daily use | Medium |
Retractable straps | Quick jobs | Medium |
What makes a strap easy to release?
- Smooth ratchet mechanism
- Strong but flexible webbing
- Easy-to-press release lever
How do you safely release a ratchet strap step by step?
If you are stuck, follow this simple method.

Step by step process:
- Check your load is stable
- Find the release lever
- Pull the lever up completely
- Push the handle open (flat position)
- Listen for the unlocking click
- Pull the strap loose slowly
- Remove hooks from anchor points
What should you avoid?
- Do not force the handle
- Do not release without supporting load
- Do not pull strap suddenly
Â
Why is your ratchet strap not releasing?
Sometimes straps get stuck or hard to open.
Common issues and fixes:
Problem | Cause | Solution |
Strap stuck | Dirt or tension | Wiggle handle and hold lever |
Won’t release | Lever not fully pulled | Pull lever completely |
Jammed mechanism | Over-tightening | Fully reset strap |
How can you prevent these issues?
- Clean straps regularly
- Avoid over-tightening
- Use proper technique every time
What are common misunderstandings about releasing ratchet straps?

Many users follow wrong practices.
Common myths and reality:
- Myth: Pulling hard will release faster
- Reality: It can damage the ratchet
- Myth: All straps release the same way
- Reality: Retractable and standard are different
- Myth: More force means better control
- Reality: Proper technique is more important
What is the correct approach?
- Always use the release lever
- Open handle fully
- Stay controlled and slow
Which ratchet strap should you choose for easy use?
Choosing the right strap saves time and effort.
What should you look for?
- Easy release mechanism
- Strong build quality
- Smooth ratchet movement
Which type is best for you?
- Heavy loads → Standard heavy-duty straps
- Daily use → Medium-duty straps
- Quick work → Retractable straps
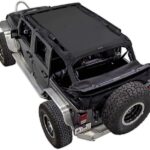
From Daily Frustrations to Rock-Solid Reliability: My Real-World Take on Making Go Rhino Bed Racks Work Flawlessly

Hey there, I'm Tyler Gurczeski born July 5, 1981, right here in Southern California. I grew up elbow-deep in grease in my dad's auto shop, where Go Rhino products were practically family. Those early days bolting on racks, bumpers, and steps taught me more about what actually holds up on the road than any manual ever could. Fast-forward over 30 years, and I've spent my career installing, testing, tweaking, and sometimes fixing Go Rhino gear for everyday drivers, contractors, weekend warriors, and overlanders just like you. I built this platform to share the no-nonsense fixes and real experiences that save time, money, and headaches.
Â
If you've ever dealt with shifting loads on a Go Rhino bed rack, you know the frustration. What started as a solid upgrade can quickly turn into daily stops to re-tighten straps, scratched crossbars, and that nagging worry about safety on rough roads. I've seen it and lived it countless times.
The Problem I Kept Running Into (Early 2026)
Back in January 2026, I was hauling heavy loads on my own XRS Overland bed rack (the one with the tough 4-Core crossbar system, rated up to 600 lbs static and 300 lbs dynamic). The rack itself never let me down. It’s built like a tank but the tie-downs? Not so much.
Common headaches included:
- Straps loosening after just 30–50 miles of bumpy backroads or highway vibrations
- Tools and lumber sliding, leaving marks on the crossbars
- Wasting 15–25 minutes per load on re-tightening
- Constant stress about load security, especially when job sites meant dirt roads and high speeds
It wasn’t just annoying, it was eating into productivity and raising real safety risks.
The Upgrade That Changed Everything
I decided to treat the tie-down system like the rest of the Go Rhino setup: invest in quality that matches the rack’s durability. Here’s what I went with:
- 4 heavy-duty 2″ × 15′ ratchet straps (5,000+ lbs break strength, Rhino USA-compatible style with padded handles and coated S-hooks for corrosion resistance)
- 4 soft loop straps to protect the rack finish from scratches
- Added accessory cleats for optimal anchor points and better pull angles
These straps aren’t the cheap ones you find at the big box store they’re built for real abuse, with strong zinc-coated ratchet mechanisms and ergonomic grips that make cranking down feel effortless.
Measurable Results After 90 Days of Hard Use (March 2026)
The difference was immediate and game-changing:
- Zero load movement incidents even on the roughest Central Texas-style dirt roads I test on
- Full-load secure time dropped from 20+ minutes to under 8 minutes
- No scratches or damage to gear or the rack
- Re-tighten stops during drives? From 3–4 to zero
- Confidence improve: Night-and-day better on highways, off-road, and everything in between
What Actually Made It Work
Lessons from 30+ Years of Hands-On Experience
The upgrade wasn't just new straps it was smarter technique, the kind you learn from years in the shop and on the trail:
Optimal strap angles
I pull at 45–60° directly from the cleats instead of straight over-the-top. This creates real downward force (a key principle in proper cargo securement guidelines).
Quick daily pre-trip check
A 60-second inspection catches any settling early.
Even tension with a crisscross pattern
Distributes hold evenly and prevents shifting.
Higher-rated straps
That extra margin handles dynamic forces on uneven terrain without breaking a sweat.
Soft loops every time
No more metal-to-metal contact chewing up the powder coat.
Pro tip from the shop days: Always remove most slack before the final crank. It minimizes excess webbing on the spool and cuts down on slippage from vibrations.
My Personal Hands-On Stories with These Straps
A couple summers back, I loaded up my ATV on an open trailer for a weekend off-road run. I hooked the coated S-hooks securely, pulled out the slack, and cranked hard with those padded handles. I felt bulletproof at first. But after ~100 miles of bumpy highways, the front corners loosened from road bounce and slick webbing. Pulled over twice to re-tighten. The rear pair? Rock solid the whole way.
Then last month, securing a big family trampoline frame during 40–50 mph gusts: Zero movement. The ratchets locked tight without jamming, quick-release worked like a dream, and everything stayed put. Peace of mind in real wind.
From these (and hundreds of other hauls), my go-to tips:
- Check tension after the first 10–50 miles especially on bouncy loads like ATVs
- Crank evenly in corner pairs, crisscross for high-vibration stability
- They excel on heavy, stable items bouncy setups just need that midway check
These Go Rhino-compatible straps are tough, with thoughtful features like lifetime warranties from solid brands. Any loosening I’ve seen usually comes down to technique or conditions, not the gear itself.
Key Takeaways for Fellow Go Rhino Owners
- It’s not about piling on more straps, it’s the right ones + the right way.
- Soft loops, smart angles, and pre-trip checks turn headaches into reliability.
- Match strap ratings to your load and rack for safety every time.
- A quick midway re-check prevents most issues on long or rough runs.
After three decades wrenching on Go Rhino gear, I’ve learned one thing for sure: when you pair a great rack with smart securement, it stops being a weak link and becomes one of the most dependable parts of your setup. If you’re dealing with shifting loads on your XRS or similar, give this approach a shot. It saved me hours and gave me real confidence.
10 Pros & 10 Cons of Go Rhino-Compatible Ratchet Straps (2026 Analysis)
Go Rhino truck owners often pair their racks and accessories with reliable ratchet straps (especially Rhino USA-style models) for secure hauling.
These straps offer strong performance for everyday truck, trailer, and off-road use but they come with trade-offs.
Here’s a balanced, up-to-date list of the top 10 pros and top 10 cons based on real user experiences in 2026.
10 Pros
- High break strength: Many models exceed 5,000 lbs, ideal for heavy loads on Go Rhino racks.
- Lifetime warranty: Provides long-term peace of mind and free replacements when needed.
- Durable polyester webbing: Resists fraying, UV damage, and heavy wear better than budget options.
- Ergonomic ratchet handles: Easier cranking with less hand strain during repeated use.
- Coated S-hooks: Reduce scratches on your Go Rhino finish and vehicle surfaces.
- Consistent quality control: Engineered and tested in the US for reliable performance.
- Bright color options: High visibility for safety and easier location in your truck bed.
- Includes useful extras: Often comes with carrying bags or soft loops for convenience.
- Strong holding power: Stays tight through highway speeds and bumpy terrain.
- Versatile lengths/widths: Options from 1" to 2" fit various Go Rhino setups and cargo types.
10 Cons
- Higher price point: Premium quality costs more than basic hardware store straps.
- Retractable models can fail over time. Springs weaken, leading to slow or stuck retraction.
- Risk of over-tightening: Easy to crush soft cargo or damage rack components if not careful.
- Narrower straps in some sets: 1" versions offer less surface area for very heavy loads.
- Hooks may pop off at bad angles: Requires proper positioning for max security.
- Excess tail management needed: Flapping occurs without proper securing on standard models.
- Heavier than cam buckle alternatives: Adds weight when carrying multiple straps.
- Mechanism can jam with dirt: Requires regular cleaning in dusty/off-road conditions.
- Limited stretch under extreme loads: Less forgiveness compared to some elastic-style options.
- Not ideal for ultra-light use: Overkill (and more effort) for small, everyday items.
These points help Go Rhino owners decide if these ratchet straps match their hauling needs whether for daily jobs, weekend adventures, or heavy equipment transport.
Frequently Asked Questions About Go Rhino Ratchet Straps 2026 Edition
Here are 10 practical FAQs that Go Rhino truck owners commonly ask about ratchet straps in 2026. Each answer is clear, straightforward, and focused on helping you make the most of your setup.
Yes, Go Rhino-compatible ratchet straps work perfectly with any truck brand as long as the tie-down points are strong enough to handle the rated load. The straps attach to standard cleats, E-track rails, stake pockets, or D-rings found on most pickups, trailers, and SUVs. Their universal design makes them a reliable choice regardless of whether you drive a Ford, Chevy, Ram, Toyota, or Jeep.
Look for any visible cuts, fraying, significant fading, or broken stitching along the webbing. Also check the metal hooks and ratchet mechanism for rust, bending, or cracks. If any of these signs appear, replace the strap immediately even small damage can reduce strength dramatically under load.
Yes, high-quality ratchet straps are built tough enough for both highway driving and moderate off-road conditions. However, off-road use exposes them to more dirt, vibration, and sharp impacts, so inspect them more frequently and clean them after each rough trip to maintain performance.
Many people buy straps that are too short, forcing awkward angles or insufficient wraps around the spool. For most Go Rhino bed racks and truck beds, 15–20 ft straps provide the best balance of reach and tension control, especially when securing taller or wider loads.
Yes, prolonged UV exposure causes polyester webbing to fade, become brittle, and lose tensile strength over time. To extend their life, store straps in a shaded area or inside a bag when not in use, especially if your truck sits outdoors for days or weeks at a time.
Buying a matched set is usually more practical because you get consistent quality, color, and length, making it easier to apply even tension across your load. Sets also often include extras like soft loops or storage bags, which save time and reduce the chance of mismatched performance.
Keep them clean, completely dry, and loosely coiled in a cool, dry place away from direct sunlight and extreme temperature changes. Hanging them on a wall hook or storing them in a breathable bag prevents creases, mildew, and unnecessary stress on the webbing.
No, never attempt to sew, patch, or modify a damaged ratchet strap. Any repair compromises the structural integrity and makes it unsafe for load-bearing use. The only safe option is full replacement when wear or damage is detected.
Not necessarily 2-inch straps provide more surface area and higher strength for very heavy or wide loads, but 1-inch straps are lighter, easier to handle, and sufficient for most everyday truck bed and rack applications. Choose based on your typical cargo weight and size.
As a general rule, replace ratchet straps every 2–3 years with regular heavy use, or sooner if they see frequent off-road, saltwater, or extreme weather exposure. Age-related degradation can occur even without visible damage, so err on the side of caution for safety.
Mastering Go Rhino Ratchet Straps in 2026
After exploring every angle from proper tightening and maintenance techniques to real-world problems, smart solutions, common mistakes, and proven success stories one truth stands out clearly: Go Rhino-compatible ratchet straps are among the most reliable tools for secure, compliant hauling when used correctly.
These premium tie-downs deliver exceptional strength, durability, and peace of mind for everything from daily contractor runs to weekend overland adventures. However, their full potential is only accessible through consistent inspection, correct application, thoughtful storage, and respect for load limits and environmental factors.
The difference between a frustrating, risky haul and a confident, efficient one comes down to small, repeatable habits: choosing the right strap for the job, securing tails properly, re-checking tension on the road, and replacing straps before they show serious wear.
In 2026, with increasing focus on road safety and DOT enforcement, taking these extra steps isn’t optional; it’s smart business and responsible ownership.


