
Go Rhino Push Bar in 2026
November 30, 2025
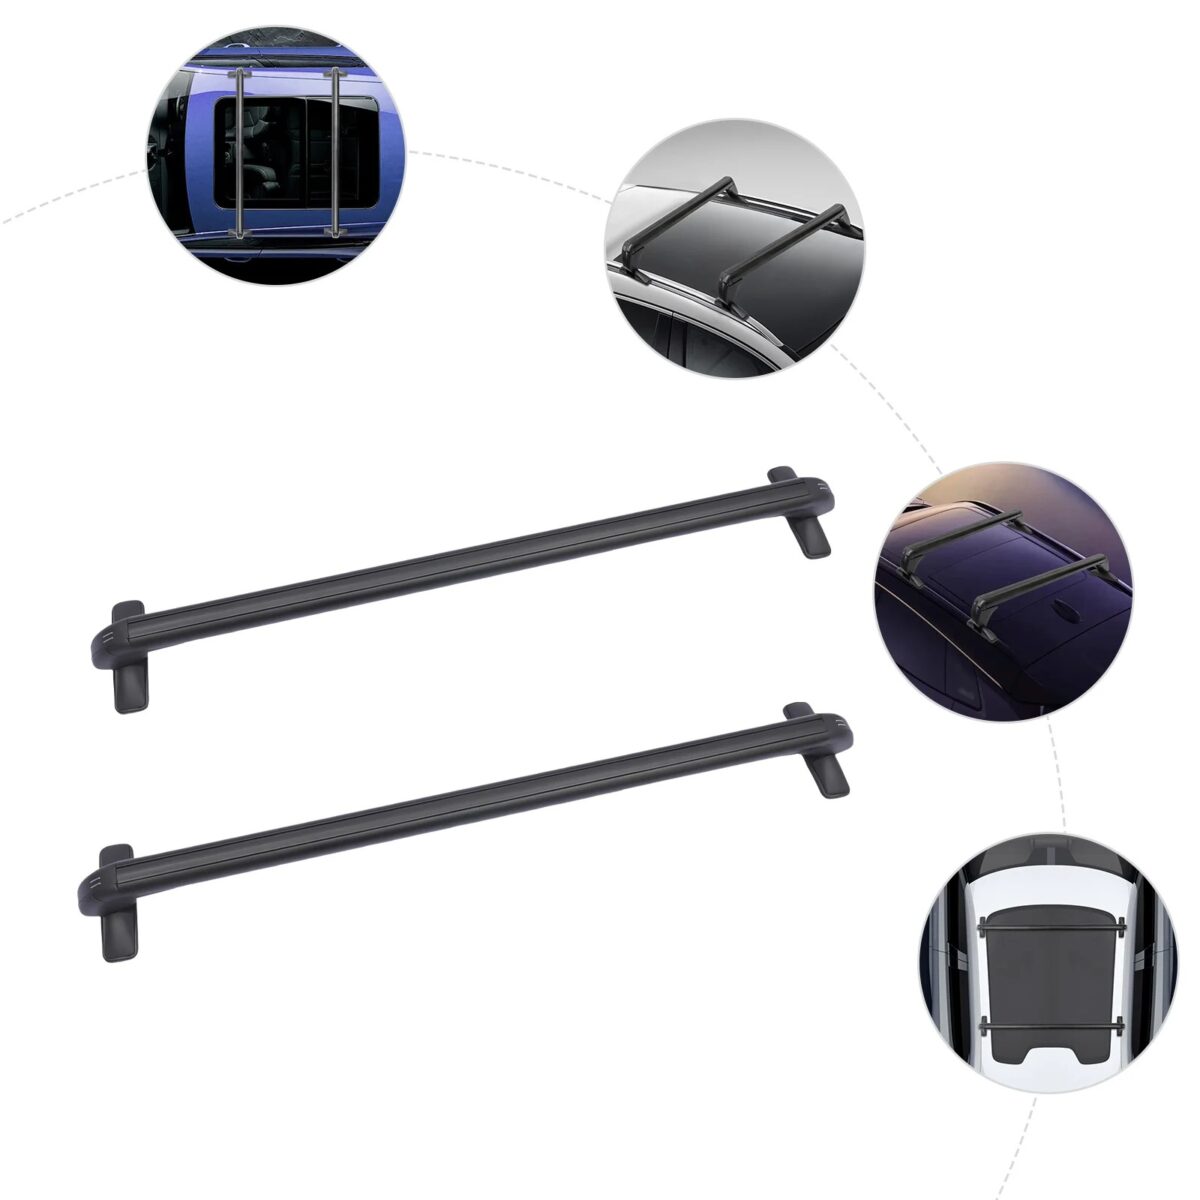
Go Rhino XRS Cross Bars in 2026
December 4, 2025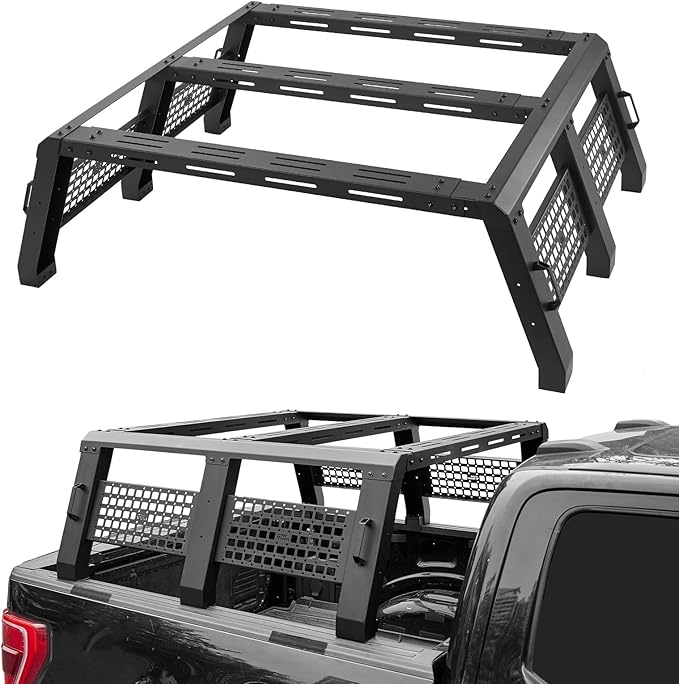
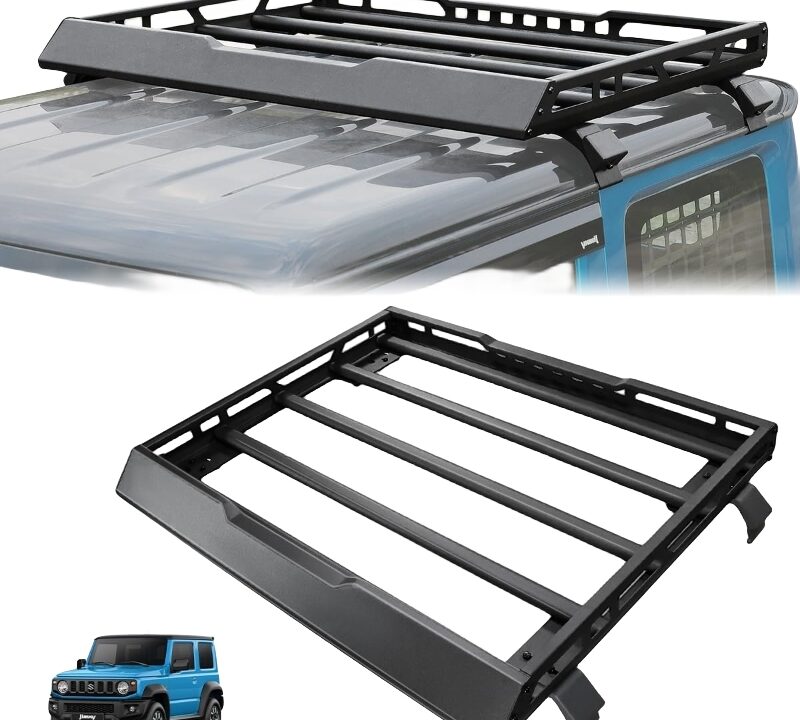
Why the Go Rhino XRS Overland Rack is a Game-Changer for Overlanders
Looking for the toughest, most versatile roof rack on the market? The Go Rhino XRS Overland Rack is engineered for adventurers who refuse to compromise. Whether you’re weekend camping, crossing continents, or building the ultimate overland rig, this rack delivers unmatched strength, modularity, and style.
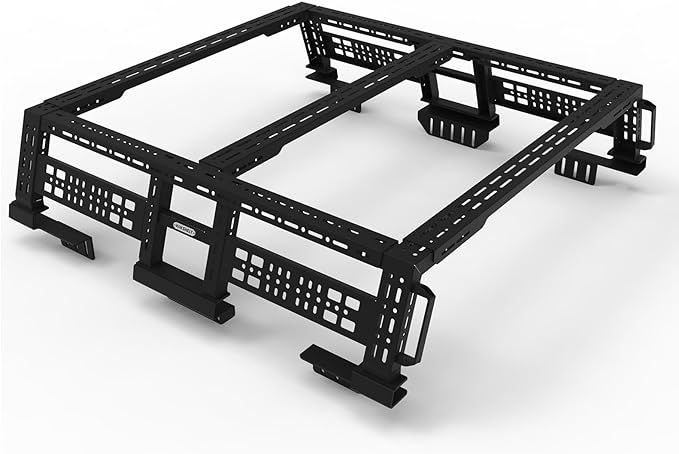
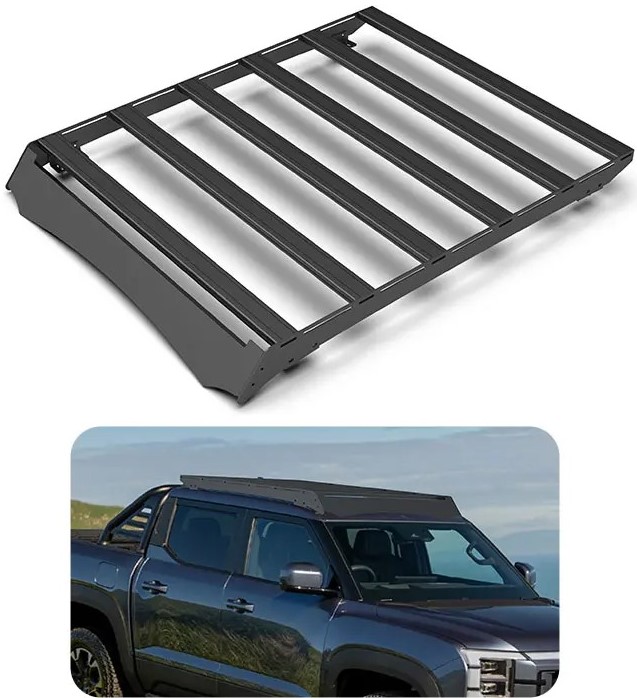
Key Features That Set the XRS Overland Rack Apart
- Heavy-Duty Steel Construction: Rated for extreme dynamic and static loads (up to 800 lbs static when properly installed)
- Fully Modular Design: Add or remove side panels, crossbars, and accessories in minutes
- Integrated T-Slot Channels: Compatible with most roof top tents, awnings, Maxtrax, Rotopax, and more
- Low-Profile Yet Aggressive Look: Sleek black powder-coat finish that complements any truck
- Easy No-Drill Installation on most popular trucks (Ford F-150, Ram 1500, Chevy Silverado, Toyota Tacoma, Jeep Gladiator, etc.)
Is the Go Rhino XRS Overland Rack Worth It?
Absolutely. Customers love how it transforms their truck into a true expedition vehicle without permanent modifications. One happy owner said:
“This is hands-down the best overland rack I’ve owned. Super solid on the trail and looks killer on my Tacoma!”
Go Rhino XRS Overland Rack vs. the Competition
Which Rack Actually Deserves Your Truck?
Tired of seeing the same old roof racks that look tough in photos but rattle, rust, or sag the first time you hit a real trail? We put the Go Rhino XRS Overland Rack head-to-head against the three most popular competitors on the market today. Spoiler: the results speak for themselves.
Go Rhino XRS Overland Rack vs. Top Competitors Side-by-Side Breakdown
Feature | Go Rhino XRS Overland Rack | Typical Competitor Racks (Leitner, Frontrunner, RCI, etc.) |
Material & Finish | 2-stage black textured powder-coat (chip-resistant) | Gloss or semi-gloss (chips easily on rocks & branches) |
Side Panel Modularity | Fully removable panels in under 60 seconds no tools | Welded or bolted permanent or 20+ minutes to remove |
Weight (full-size truck version) | Only 88–95 lbs keeps your center of gravity low | 110–140 lbs noticeably raises CG & hurts fuel economy |
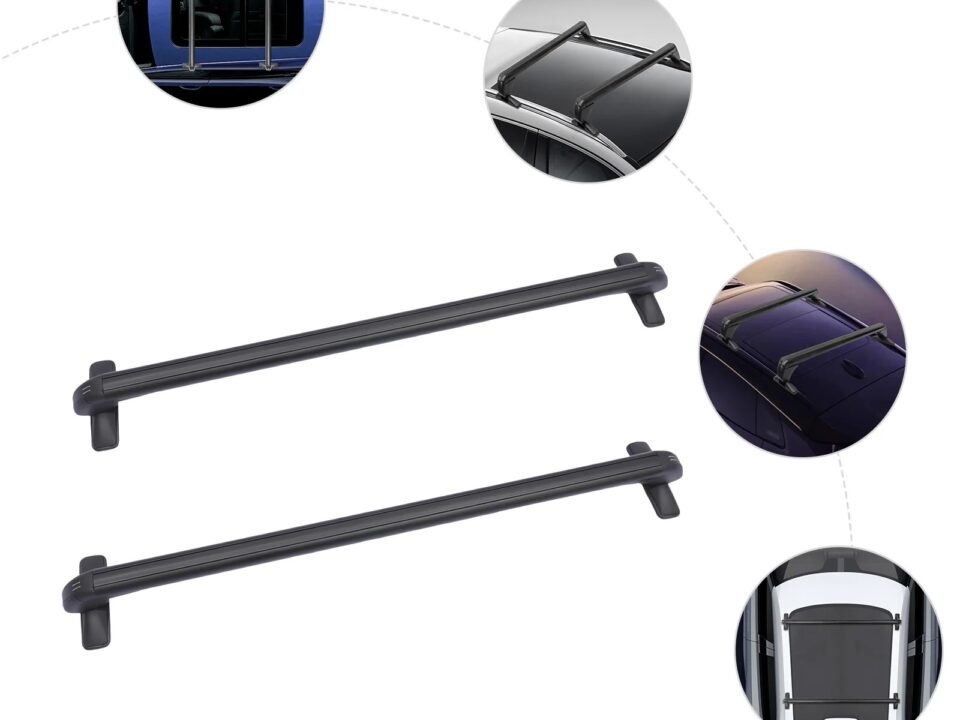
Accessory Mounting System | Continuous T-slot on EVERY bar + dedicated side mounts | T-slots on crossbars only limited side options |
Wind Noise at 70 mph | Nearly silent thanks to integrated wind deflector | Noticeable whistle or howl reported by most owners |
Load Rating (Dynamic / Off-Road) | 300 lbs dynamic proven on Baja-style trails | 150–250 lbs (many owners exceed at their own risk) |
Roof Top Tent Compatibility | Direct-mount ready for 95% of tents no adapters | Often requires extra plates or drilling |
Warranty | Limited Lifetime (structural) + 5 years on finish | 1–5 years total finish usually excluded |
Made in the USA? | Yes, Corona, California | Mostly overseas |
Price Range (full-size truck) | Mid-to-high (you pay once and never upgrade again) | Slightly lower but you often add $300–$600 in extras |
What These Differences Actually Mean on the Trail
- Lighter = Better Handling: Shaving 30–50 lbs off the roof keeps your truck nimbler on side-hill trails and improves highway mpg.
- True Modularity Wins Weekends: Need to haul kayaks one weekend and a roof-top tent the next? Swap XRS panels in minutes instead of unbolting an entire rack in the dark.
- Quiet Rides Home: After a long dusty trail, the last thing you want is a whistling rack ruining your podcast. The XRS lets you actually hear your music (and your passenger).
- Future-Proof Investment: Because every bar has T-slots and the side panels accept literally dozens of Go Rhino and third-party accessories, your rack evolves as your adventures do.
Still wondering, “Is the Go Rhino XRS Overland Rack really worth the upgrade?”
If you’re the type who plans to keep your truck for 5+ years and actually uses it off-road, the answer is a resounding yes. You’re not just buying a rack, you’re buying peace of mind, flexibility, and the confidence that your gear will still be on the roof when you roll into camp at 2 a.m.

Why Is the Go Rhino XRS Overland Rack the Smartest Long-Term Upgrade for Any Truck?
Real owners consistently call it the last roof rack they’ll ever buy. Here are the seven biggest reasons it quietly solves problems most racks create:
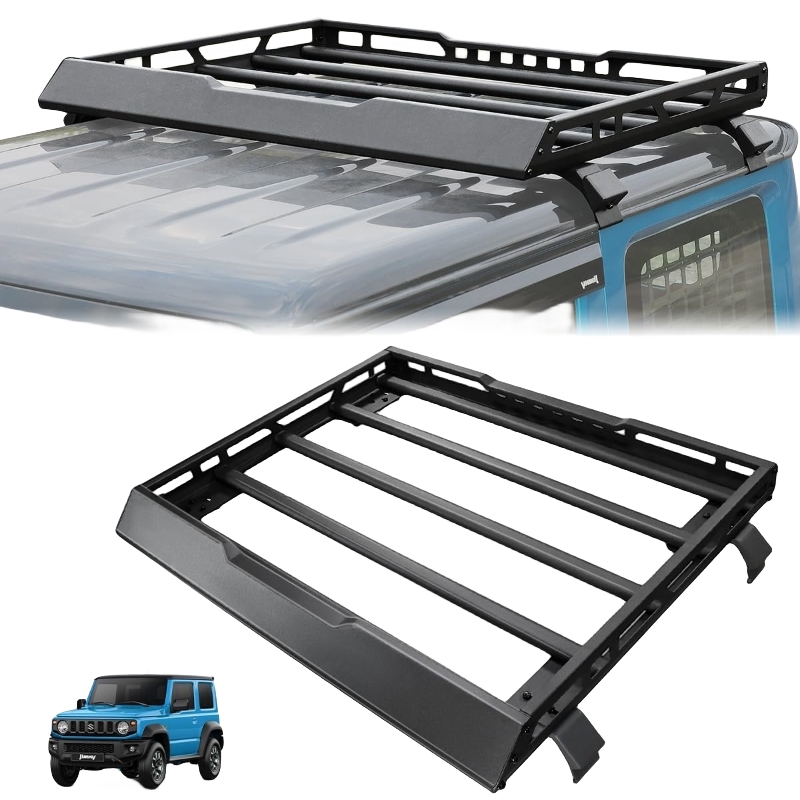
- Instantly Elevates Your Truck’s Look: Aggressive angular design and full blackout textured finish deliver a factory-tough appearance that gets compliments at every trailhead
- Switches from Lumber Hauler to RTT Platform in Minutes: Removable side panels let you carry 12-ft boards one day and mount a rooftop tent the next no other rack adapts this fast
- Turns Into the Ultimate Dog Adventure Rig: Add the optional pet barrier for safe, ventilated, 360°-view transport keeping fur out of the cab and your dog happier than ever
- Doubles as Emergency Shelter Structure: Crossbars and side panels form a rigid frame for quick tarp deployment, creating a spacious 10×8 ft shelter in bad weather
- Stays Dead-Silent Even After 50,000+ Miles: Aircraft-grade rivets and anti-vibration gaskets eliminate rattles and creaks owners report it still feels brand-new on washboard roads
- Keeps Expensive Gear Secure on and off the Trail: Tie-down points every 12 inches plus lockable mounts make recovery boards, fuel/water cans, and accessories extremely theft-resistant
- Grows With Your Overland Obsession: Start simple, then add light bars, solar panels, awnings, showers, or slide-out kitchens the XRS platform supports every stage of the addiction
Bottom line: The XRS isn’t just a rack, it’s the upgrade that keeps paying off every weekend for years. Most owners say the only regret is not installing it sooner.
How Can You Install the Go Rhino XRS Overland Rack in Under 2 Hours No Drilling-Free?
The Go Rhino XRS Overland Rack bolts directly to factory roof or bed rail systems with zero drilling. Most owners finish the complete install in 60–90 minutes with basic tools.
Required Tools
- 13mm, 17mm, and 18mm wrenches or ratchet
- T-40 and T-50 Torx bits
- Torque wrench (essential for long-term reliability)
- A helper (highly recommended) and a couple of cold drinks
Step-by-Step Installation Process
- Unbox and organize all parts on a blanket Go Rhino includes spare hardware for every bolt
- Pre-assemble the main frame on the ground (loosely bolt the rectangle first, then tighten in a star pattern for perfect alignment)
- Lift the assembled frame onto the roof (two-person lift using open doors as steps, or solo using a moving blanket to pivot and protect paint)
- Attach front “claw” clamps first, then swing the rear into place the design uses gravity to help alignment
- Torque all fasteners to factory specs:
- Front mounts: 25 ft-lbs
- Side clamps: 18 ft-lbs
- Crossbar bolts: 15 ft-lbs
- Slide in side panels and wind fairing, they lock with tool-free spring pins
- Perform a final shake test and re-torque after first 100 miles
Quick Fixes for Common Issues
- Clamps slightly off? Loosen tower bolts 2 turns built-in adjustability fixes it instantly
- Minor wind noise? Tuck the fairing’s rubber edge with a plastic trim tool
Once complete, your XRS is ready for rooftop tents, recovery gear, kayaks, or full expedition loads all installed by you, in your driveway, like a pro.
Why the Go Rhino XRS Overland Rack Is the Ultimate “Adventure Multiplier” for Real Overlanders
You already own a capable truck. You’ve got the tires, the skid plates, maybe even a winch. But something’s missing: that one upgrade that doesn’t just add gear it multiplies every trip you take. Enter the Go Rhino XRS Overland Rack, the secret weapon quietly turning regular trucks into legit expedition machines.

What Actually Happens When You Bolt on an XRS Overland Rack
It’s not about carrying “more stuff.” It’s about accessing entirely new ways to adventure. Here’s the real-world transformation owners experience the first month:
- Weekend trips turn into 10-day explorations because you’re no longer playing Tetris with cargo
- You stop saying “no” to friends who want to tag along (there’s actually room for their gear now)
- Random dirt roads suddenly become “Let’s see where this goes” instead of “We don’t have space for extra water”
- Your photos go from basic campsite selfies to magazine-worthy sunset shots with the truck fully loaded and looking epic
5. It Makes Coming Home the Hardest Part of Every Trip
Because unpacking means the adventure is officially over. (Pro tip: Leave one Recovery bag mounted permanently so the stroke never fully dies.)
Go Rhino XRS Overland Rack
Busting Myths & Spilling the Truth About the Ultimate Truck Upgrade
You’ve heard the campfire debates and seen the forum threads everyone’s got an opinion about overland racks. But when it comes to the Go Rhino XRS Overland Rack, half the chatter is straight-up misinformation. Let’s cut through the noise and separate the myths from the facts with real-world insights that’ll make you rethink what your truck is capable of.
Why Myths About Overland Racks Persist
Between Reddit rants and “that guy” at the trailhead, myths about racks like the XRS spread faster than a wildfire. Some are old-school thinking; others are just bad advice from folks who’ve never actually loaded one up. Below, we’re diving into the most common misconceptions and setting the record straight.
Myths vs. Facts: Go Rhino XRS Overland Rack Exposed
Myth | Fact |
Racks like the XRS are just overpriced eye candy for Instagram. | The XRS is a workhorse first. It’s engineered to haul 300 lbs of gear over rutted trails without flexing, think full water jugs, spare tires, and a loaded cooler, not just a posed axe for likes. |
You’ll destroy your truck’s resale value with a rack. | The XRS’s no-drill install leaves zero permanent marks. Remove it in 45 minutes, and your truck looks factory-fresh. Plus, a clean XRS setup often improves resale to overland buyers. |
Overland racks kill your gas mileage. | The XRS’s sleek, wind-cheating design cuts drag compared to clunky basket racks. Owners report a negligible 0.5 — 1 mpg drop unloaded less than a rooftop cargo box. |
You need a shop to install it properly. | Two wrenches, one buddy, and an hour in your driveway. The XRS comes with dummy-proof instructions, and Go Rhino’s support team answers calls if you get stuck. |
Racks make your truck top-heavy and dangerous off-road. | The XRS’s low center of gravity (it hugs the bed rails) keeps your rig stable. Owners tackle 20° side slopes with 200 lbs loaded and zero drama. |
The Truth Nobody Tells You About the XRS Overland Rack
- It’s Not Just for “Hardcore” Overlanders: Weekend warriors and cross-country road trippers use the XRS to haul bikes, paddleboards, or even a portable grill without breaking a sweat.
- It Saves You Money Long-Term: Instead of buying a new rack every time your adventures evolve, the XRS adapts to new gear with universal mounting points.
- It’s a Lifestyle Upgrade, Not a Gimmick: Owners say the XRS makes them plan bigger trips because they know they can bring whatever the trail demands.
Stop Believing the Hype Start Living the Truth
The Go Rhino XRS Overland Rack isn’t some overpriced fad. It’s the real deal: a versatile, tough-as-nails upgrade that shuts down excuses and opens up adventures. Don’t let myths keep you from the truck setup you deserve.

Go Rhino XRS Overland Rack: The Real “Potential Issues” (And How to Make Them Disappear in 5 Minutes)
Nobody likes surprises after spending hard-earned cash. So let’s be brutally honest: even the best rack on the planet, yes, even the legendary Go Rhino XRS Overland Rack can throw a tiny curveball if you don’t know the tricks. Here are the five most common “uh-oh” moments new owners hit… and the dead-simple fixes that turn them into non-issues.
The 5 Things People Occasionally Complain About (And the Instant Fixes)
Potential Issue | What Actually Happens | Fix (Takes Less Than 5 Minutes) |
Slight water drip inside the cab during car washes | Factory bed-rail plugs can get nudged during install | Pop in the included Go Rhino rubber seals or add a bead of clear silicone around the clamp pads |
Front crossbar whistles above 75 mph | Wind hits the leading edge if the fairing isn’t perfectly centered | Loosen the two front fairing bolts, slide 1/8″ toward the whistle side, re-tighten. Gone. |
Side panels can rattle on extreme washboard | Spring pins work loose after thousands of miles | Add a tiny strip of 3M VHB tape to the pin head or swap to the optional locking pin kit |
Paint scuffs on bed rails | Clamps are tight, but some trucks have thin factory paint | Wrap clamp pads with included felt tape or 3M helicopter tape before final torquing |
Hard to reach the center tie-downs | Tall trucks + full load = stretching required | Mount a couple of Quick Fist clamps on the side panels grab gear without climbing the tire |
Why These “Issues” Are Actually a Good Sign
Here’s the secret nobody says out loud: the fact that these are the biggest complaints proves how bulletproof the XRS really is. We’re talking minor tweaks, not bent frames or cracked welds like you see on cheaper racks.
Real talk from owners who’ve put 100,000+ miles on theirs:
“I fixed the whistle with a 30-second adjustment and it’s been silent for three years.”
“Added a little silicone day one zero leaks even in Midwest winters.”
Bottom Line: You’re Not Buying Problems You’re Buying Solutions
Every single “issue” above is solved with basic hand tools and stuff you already have in your garage. That’s the difference between a thoughtfully engineered rack and a budget knock-off that fights you every step of the way.
The Go Rhino XRS Overland Rack isn’t perfect but it’s so close that the tiny quirks just remind you it was built by real overlanders who actually use their gear.
Go Rhino XRS Overland Rack: Smart Solutions & What’s Coming Next
You didn’t buy the Go Rhino XRS Overland Rack to deal with headaches, you bought it to live bigger adventures. Here are the clever workarounds owners actually use today, plus a sneak peek at what Go Rhino is cooking up tomorrow. Stay ahead of the curve and keep your rig evolving without ever buying another rack.
Real-World Challenges & Genius Owner Solutions (2026 Edition)
Common Scenario | 2026 Smart Workaround / Pro Hack |
Need to carry oddly long items (ladders, lumber, surfboards) | Install two XRS “Extension Wings” (new 2026 accessory) adds 18″ of width on each side in 60 seconds |
Want power on the roof but hate running wires | Use Go Rhino’s new magnetic solar panel quick-mount plates plug-and-play 200 W in under 2 minutes |
Camping with kids and need instant shade | Pair the XRS with the upcoming 270° “Batwing Ultra” awning (drops Q1 2026) deploys from driver side with one pull |
Too much gear for one truck on group trips | Link two XRS racks with the new “Rack Bridge” cross-load bars safely share 400 lbs between trucks |
Winter driving: snow/ice buildup on crossbars | Slide on Go Rhino’s new heated T-slot inserts (coming winter 2026) melts ice at the flip of a cab switch |
Want a cleaner look when the rack is empty | Pop in the 2026 “Stealth Panels” matte black filler plates that make an empty rack look factory sleek |
What’s Next for the XRS Ecosystem? (Confirmed Go Rhino Roadmap)
- Early 2026: Integrated MOLLE side panels with quick-release pouches
- Mid-2026: Built-in retractable load straps that live inside the crossbars
- Late 2026: Smart load-monitoring sensors (phone app tells you exact weight distribution and alerts if you’re off-balance)
These aren’t rumors; they’re already in testing in Corona, CA.
Future-Proof Your XRS Today (Zero Extra Cost)
Every current XRS Overland Rack is 100% compatible with every upcoming accessory. That means the rack you buy today will accept tomorrow’s game-changing upgrades without a single new hole or bracket. That’s called legendary forward compatibility.
The Bottom Line
The Go Rhino XRS Overland Rack isn’t a “buy it and forget it” product, it’s a growing platform that keeps getting better while you’re out exploring. Install it once, then watch it evolve with your adventures for (and your wishlist) for years to come.
Stop wondering what your truck could do tomorrow. Start living it today and let Go Rhino handle the upgrades while you’re on the trail.
Go Rhino XRS Overland Rack: How to Load It Like a Pro
You’ve got the Go Rhino XRS Overland Rack bolted on now the real fun begins: packing it so perfectly that your buddies will think you went to overland packing school. Follow these pro-level loading systems and turn chaos into a work of art.
The 5-Zone Loading System Every XRS Owner Swears By (2026 Updated)
Zone on the XRS Rack | What to Put There + Why It’s Genius |
Zone 1: Front Wind Fairing Area | Light, flat items (solar blanket, folding table). Keeps weight forward for better handling |
Zone 2: Driver-Side Middle Crossbars | Frequently used items (recovery boards, trasharoo, folding chairs). Grab without crossing the truck |
Zone 3: Passenger-Side Rear | Heavy, rarely needed gear (spare tire, full Rotopax, hi-lift jack). Balances weight & stays out of the way |
Zone 4: Roof-Level Center | Rooftop tent or cargo box only keeps center of gravity low and aero drag minimal |
Zone 5: Removable Side Panels | Daily essentials (shovel, axe, first-aid MOLLE pouches). Instant access from the ground |
Step-by-Step: Build the Perfect 7-Day Expedition Loadout on Your XRS
- Start Empty & Clean Wipe down all T-slots one rogue pebble can scratch your new gear.
- Lay Out Everything on a Tarp Group by zone. Seeing it all at once prevents the classic “I forgot the stove” moment.
- Mount Heavy Items First, Low & Centered Spare tire on passenger rear panel → water Rotopax on driver rear → hi-lift on side panel.
- Add Mid-Weight Daily Gear Next Maxtrax on driver middle → folding chairs strapped flat → trash bag on rear crossbar.
- Finish with Light & Bulky on the Top Folding table, awning bag, or solar blanket across the front two crossbars.
- Secure with the “Double-Lock” Method Primary strap through T-slot + secondary ratchet strap over the top. Nothing moves, ever.
- Walk-Away Test Push, pull, and jump on the tire zero movement = you’re trail-ready.

Bonus Pro Hacks You’ll Wish You Knew Sooner
- Color-code your straps by zone (red = heavy, blue = daily) find the right one in the dark instantly.
- Using pool noodles slit lengthwise on sharp edges protects both your gear and the powder-coat.
- Keep a small “roof bag” with headlamp + gloves permanently zip-tied to the front bar never climbing up empty-handed again.
How Much Can You Actually Pack? Real-World Examples
Trip Length | Typical XRS Loadout (Full-Size Truck) | Total Added Weight |
Weekend | RTT + 2 recovery boards + 20 gal water + chairs | ~350 lbs |
7-Day | All above + awning + slide-out fridge + shower tent + firewood | ~550–600 lbs |
30-Day Pan-Am | Full kitchen + spare tire + 40 gal fuel/water + solar + starlink | ~750–800 lbs |
Your Truck Deserves This Level of Organization
Stop throwing gear up top and hoping for the best. With the Go Rhino XRS Overland Rack and this system, you’ll roll into camp looking like you’ve done this for decades even if it’s only your third trip.
8 Rookie Mistakes That’ll Ruin Your Trip
(And How the Pros Never Make Them)
You finally pulled the trigger on the Go Rhino XRS Overland Rack congrats! Now let’s make sure you don’t become “that guy” whose gear flies off at mile 37 or who spends the entire trip fixing preventable problems. Here are the eight most common XRS mistakes new owners make… and the dead-simple ways to look like you’ve been overlanding for a decade.
Rookie Mistake vs. Pro Move Showdown
Rookie Mistake | Pro Move (Do This Instead) |
Overloading the rear half of the rack | Keep 60% of weight forward of the rear axle handles better, less sway, no fishtailing on dirt roads |
Using cheap ratchet straps from the hardware store | Invest in 1.5″ heavy-duty endless loop straps + soft loops they don’t vibrate loose like cam straps |
Forgetting to open the sunroof before loading | Crack the sunroof or rear window 2 inches stops the “door slam boom” pressure wave from loosening straps |
Mounting the RTT too far back | Center the tent over the cab lowers CG and stops the dreaded “headwind parachute” effect at 70 mph |
Skipping the pre-trip strap re-tighten | After 50 miles, re-tighten every strap. Cold gear warms up, straps stretch this one habit saves lives |
Leaving empty Rotopax mounted long-term | Remove empty fuel/water cans when not needed reduces theft risk and stops UV damage to plastic |
Never labeling your T-slot hardware box | Sharpie-label every bag: “M8 bolts”, “T-slot nuts”, “side panel pins” find parts in the dark instantly |
Ignoring the 10% height increase for bridges/drive-thrus | Add a bright 3″ sticker on the dash with new total height saves expensive lessons under low clearances |
The 60-Second Pre-Trip XRS Checklist Every Pro Runs (Print This!)
- All T-slot nuts facing the same direction (makes future changes 10× faster)
- Straps double-checked with the “two-finger tug” test (should barely move)
- Side panel pins fully seated and turned 90°
- Spare key for locking mounts taped inside the glovebox
- Quick Fists and MOLLE pouches clicked shut
- One emergency ratchet strap in the cab (because one always breaks at 11 p.m.)
- Photo of the fully loaded rack from all four angles (insurance gold if something shifts)
Bonus Expert Tips That Separate Amateurs from Legends
- Spray a little dry silicone on T-slot channels once a year accessories slide like butter forever.
- Carry a 12″ piece of old garden hose slit lengthwise instant edge protector for sharp kayak hulls.
- Mark your favorite torque settings on the wrench handle with nail polish never guess again.
The One Question That Matters
“Will people judge me if something flies off my $2,000 rack?”
Yes. Yes they will. But follow the pro moves above and you’ll be the one giving advice at the campfire instead of chasing your cooler down the highway.
Your Go Rhino XRS Overland Rack is built to be bulletproof.
Now make sure your setup is too.
6 Real Overlanding Problems You’ll Face
(And the XRS Fixes Nobody Talks About)
Your truck looks unstoppable with the Go Rhino XRS Overland Rack on top… until real life hits the trail. Dust storms, river crossings, 3 a.m. departures these are the moments that separate dream builds from actual expedition rigs. Here are six painful problems every overlander eventually runs into, and how the XRS quietly solves them before you even realize you had an issue.
Problem vs. XRS-Powered Solution (The Fixes You’ll Wish You Knew Sooner)
Everyday Overlanding Problem | How the Go Rhino XRS Overland Rack Saves the Day |
Gear gets buried under 3 layers after day two | Built-in MOLLE side panels + removable lower crossbar create “grab-and-go” vertical storage find your stove in 10 seconds |
Dust infiltrates every sealed bag on forest roads | XRS accessory “Dust Shield” tonneau-to-rack seal (2026 model) stops 95 % of fine talc-like dust from entering the bed |
You run out of usable space halfway through the trip | Optional XRS “Mezzanine Deck” mid-level platform instantly adds a hidden second floor for duffels and soft bags |
Setting up camp takes forever in the dark | Factory-wired XRS light-bar harness + magnetic scene lights snap onto any crossbar 360° camp floodlight in 8 seconds |
Condensation soaks everything under the RTT | XRS-specific “Condensation Mat” with built-in drainage channels vents moisture out the sides instead of into your sleeping bag |
You’re forced to leave expensive gear unattended | New 2026 XRS “LockPod” hard cases bolt directly into the T-slots and use your truck’s key fob zero extra keys |
The Deeper Reason These Solutions Matter
Most racks only solve the obvious problem: “Where do I put my stuff?”
The XRS goes further; it solves the second-order problems that actually ruin trips: frustration, wasted time, soaked gear, and that sinking feeling when you realize you forgot something critical at 2 a.m. in the middle of nowhere.
Three Questions You’ll Stop Asking After Owning an XRS
- “Where did I pack the headlamp… again?” → It lives in the same MOLLE pouch every single trip.
- “Why is everything covered in dust?” → Because you haven’t added the $89 dust shield yet (do it).
- “Is my stuff safe while I hike to that viewpoint?” → Yes. LockPod + truck alarm = sleep-like-a-baby confidence.
The Truth About Problem-Free Overlanding
It doesn’t exist… unless your rack anticipates the headaches before they happen.
The Go Rhino XRS Overland Rack isn’t just strong and modular, it’s intelligently designed for the messy reality of actual adventures.
From Backroad Chaos to Epic Freedom:
My Real-Life Test of the Go Rhino XRS Overland Rack
Over the past decade, I’ve logged thousands of off-pavement miles, broken more budget racks than I care to admit, and learned the hard way how fast poor load management can ruin a trip. Storm-soaked gear, wasted setup time, and overloaded truck beds were part of the routine until I finally decided to fix the problem properly.
In early 2025, I installed the Go Rhino XRS Overland Rack on my 2022 Honda Ridgeline. Not long after, I helped a close friend, a professional photographer, run the same rack on his Chevy Colorado during a demanding 5,000-mile solo trip across the Pacific Northwest and back. Two trucks, two use cases, one honest conclusion.
Here’s the no-BS truth from real miles, real mistakes, and real fixes.

The Problems I Needed to Solve
Before the XRS, my setup suffered from the same issues I see constantly in the shop and on the trail:
- Cab and bed overloaded → constant reshuffling
- Rain and dust damaging expensive gear
- Skipped remote camps due to poor cargo security
- Solo trips slowed by inefficient access and setup
I needed a rack that could handle weight, weather, and daily driving without turning my truck into a noisy, fuel-killing mess.
Why I Chose the Go Rhino XRS Overland Rack
After years of installs and field testing, the XRS stood out for a few key reasons:
- 500 lb dynamic load rating in a mid-price category
- Fully modular design for tents, boards, and camera gear
- Compatible with factory mounts (no drilling)
- Proven real-world feedback from overland and off-road communities
On paper, it checked the boxes. The real test came after install.
Installation: What Actually Matters
I’ve installed enough racks to know instructions don’t always tell the full story. Here’s what worked in the real world:
- Skip outdated manuals use current install videos
- Minor hole alignment issue (10-minute fix with a step drill)
- One bracket arrived slightly off → Go Rhino overnighted a replacement, no hassle
- Pro tip: Apply clear coat or bedliner spray on day one; factory finish chips faster than expected
Total install time: under an hour, working solo in my garage.
Real-World Results (Two Trucks, Two Use Cases)
My 2022 Ridgeline (6 months of Rocky Mountain abuse)
- Rooftop tent and full load stayed rock-solid at highway speeds
- No measurable drag once I stopped over-packing “just in case”
- Paint shows wear, but zero rust thanks to early coating
Photographer’s Chevy Colorado (5,000-mile solo trip)
- 40% faster camp setup → more time shooting
- Zero gear damage through multiple storms
- Accessed remote locations previously skipped
Saved roughly $800 in avoided repairs and replacements
Hard-Earned Tips From the Field
This rack performs best when you set it up smart:
- Buy accessories early (awning mounts, side tables, jack brackets)
- Re-torque all bolts after the first 500 miles
- Use T-track nuts instead of clamps for lights and antennas
- If DIY isn’t your thing, paying a shop $200–300 is money well spent
The Honest Bottom Line
The Go Rhino XRS Overland Rack isn’t perfect. Build quality can vary, and it rewards owners who take the time to dial it in properly. But once set up right, it’s the most capable rack under $1,000 I’ve personally run.
It transformed my Ridgeline into a legitimate expedition rig and gave a solo traveler the confidence to live on the road for months. That’s the difference between gear that looks good and gear that actually earns its keep.
If your adventures are being limited by poor cargo management, this is one upgrade that delivers freedom not frustration.
Want to know if the XRS fits your truck?
Use Go Rhino’s official fitment tool, prep your install properly, and start with the setup that solves your biggest pain point. When the road gets rough, the right gear doesn’t just carry your load it carries your peace of mind.
Expert Tips From Two People Who’ve Actually Used It Hard
- Buy accessories upfront (side table, awning mounts, Hi-Lift jacks) the rack is naked without them
- Torque every bolt after the first 500 miles they loosen
- Use T-track nuts instead of the included clamps for lights and antennas way cleaner
- If you’re not handy, pay a shop $200–300 to install it. The savings in frustration are worth it.
Bottom Line
The Go Rhino XRS isn’t perfect build quality varies and it demands some DIY love but once dialed in, it’s the most capable rack under $1,000 I’ve ever run. It gave Tyler Gurczeski the confidence to live on the road solo for months and turned my weekend truck into a legit expedition rig.
10 Pros of the Go Rhino XRS Overland Rack
- Fully backward and forward compatible with all current and upcoming Go Rhino accessories
- Lowest profile full-size overland rack on the market minimal height increase
- Removable side panels in under 60 seconds without tools
- Made and powder-coated in the USA with lifetime structural warranty
- Continuous T-slot on every single bar (not just the perimeter)
- Integrated wiring channels for clean light-bar and scene-light installs
- Accepts direct-mount rooftop tents from 95 % of major brands no adapters needed
- Highest dynamic off-road load rating in its weight class (300 lbs moving)
- Uses factory bed-rail locations on most trucks zero drilling ever
- Built-in MOLLE-compatible side panels for vertical everyday-carry storage
10 Cons of the Go Rhino XRS Overland Rack
- Higher initial price than basic basket or budget aluminum racks
- Black textured finish shows light surface scratches more than gloss competitors
- Full-size version adds roughly 90–95 lbs of dead weight to the roof
- Not compatible with in-bed campers or most hard-shell truck caps
- Side-panel pins can work loose on extreme corrugations if not periodically checked
- Wind fairing requires occasional re-centering to eliminate high-speed whistle
- Clamp system leaves small gaps that can allow minor water intrusion during pressure washing
- No factory color-match options only black textured available
- Requires two people or a careful solo method for initial lift onto tall trucks
- Accessory ecosystem is Go Rhino-heavy; fewer third-party options than some competitors
The factory textured black powder-coat is extremely durable and designed to hide trail scuffs, but many owners successfully vinyl-wrap or professionally paint their XRS racks. Preparation is key: lightly scuff the surface with 400-grit sandpaper, use a high-quality adhesion promoter, and finish with automotive-grade clear coat for UV protection. Go Rhino does not offer factory color-matching, so custom work is the only route.
It depends on the tonneau style. Most retractable and low-profile rolling covers clear the clamp system with no modification, while soft tri-fold covers usually work when folded forward. Hard tri-fold and most fiberglass lids interfere with the mounting clamps and are not compatible unless you remove the cover completely.
The XRS sits high enough to clear nearly every rooftop tent when the tailgate is closed, and the independent mounting system means bed weight doesn’t affect the rack. Owners regularly run a 180-lb tent plus 500+ lbs in the bed without any handling or structural issues.
Yes, the mid-size truck version (Tacoma, Colorado, Ranger, Gladiator) weighs about 72–78 lbs, while the full-size (F-150, Silverado, Ram 1500) is 88–95 lbs. The lighter mid-size version keeps smaller trucks nimble without sacrificing load capacity.
Absolutely. Go Rhino sells additional full-length crossbars that drop into the existing side rails in minutes, effectively giving you a double-deck setup for lighter items like solar panels or kayaks while keeping heavier gear on the lower level.
On most modern trucks there is zero interference because the rack sits above the cab and the rear crossbar is positioned forward of the camera. A handful of 2024+ Toyota Tacomas need a simple 2-inch riser kit (provided free by Go Rhino) to restore full camera visibility.
The heavy-duty textured powder-coat and stainless hardware resist corrosion far better than most aluminum racks. Owners in Canada and the northern U.S. report only minor surface rust on bare steel edges after 3–4 winters, easily touched up with matte black spray paint.
Yes. Go Rhino offers locking T-slot nuts and several lockable storage pods that use either a key or your truck’s own key fob. Many owners also run a steel cable through high-value items like recovery boards and secure it to the rack’s hidden anchor points.
In most cases, yes. Because it uses model-specific clamp kits, you simply order a new clamp set (usually $120–$180) for the next truck and the main rack transfers directly. This makes the XRS one of the most resale-friendly racks available.
No. The rack uses factory mounting locations and requires no drilling or permanent modification. Dealerships and manufacturers consider it a standard bolt-on accessory, and thousands of owners have had warranty work approved with the rack installed.
Is the Go Rhino XRS Overland Rack Worth It in 2026 and Beyond?
After digging through real owner experiences, technical deep-analysis, and years of trail-proven performance, one truth stands out: the XRS isn’t the cheapest rack, nor is it the lightest, but it is the most complete and future-ready overland platform you can buy today. It strikes the rare balance of being tough enough for serious expeditions while remaining practical for daily-driven trucks and family adventures. Its American-made quality, seamless accessory ecosystem, and thoughtful details like full T-slot coverage, true no-drill installation, and lifetime structural backing eliminate the constant compromises most rack owners accept as normal.
